 |
| The system's main components |
The system is called the A&A Worm
Farm Waste System (designed and built in Australia) and we are very happy with
it. All waste (bathroom, toilet and kitchen) flows by gravity to a storage
chamber (the worm farm). Solids form a compost heap in the tank and liquids
gradually drain through into the sump. A submersible pump activated by floats takes
a couple of minutes to pump the liquid to the disposal area where the waste is
dispersed underground.
Our plan is to one day run this waste
water through reed beds and then use it to water fruit trees. It is possible on
some sites (in fact desirable) to have the whole system run by gravity. This
would negate the need for a pump, and the only need for power would be to
charge the battery on the alarm system which lets you know if the system is not
working properly.
 |
| The rechargeable alarm |
Over 12 years we have had some large
parties and events and the system has coped well. The solids in the chamber have
reached about the halfway mark and seem to have stabilized at this level. As the
solids are broken down by microbes and worms, small particles get flushed out
with the water.
We see the system’s main advantages
as:-
·
The
waste water can be put to use in orchards or grassy areas
·
Minimal
power use (Almost nil if gravity is used instead of the pump)
·
The
cost of the system is reasonable with no ongoing maintenance contracts (like
some other systems)
·
There
is virtually no odour – even when the access lid is lifted up
·
A
simple design that doesn’t require specific technical knowledge and problems
are easy to diagnose and fix
·
Most
of the time there is no maintenance required at all
·
The
compost chamber allows easy disposal of persistent weeds and other organic matter
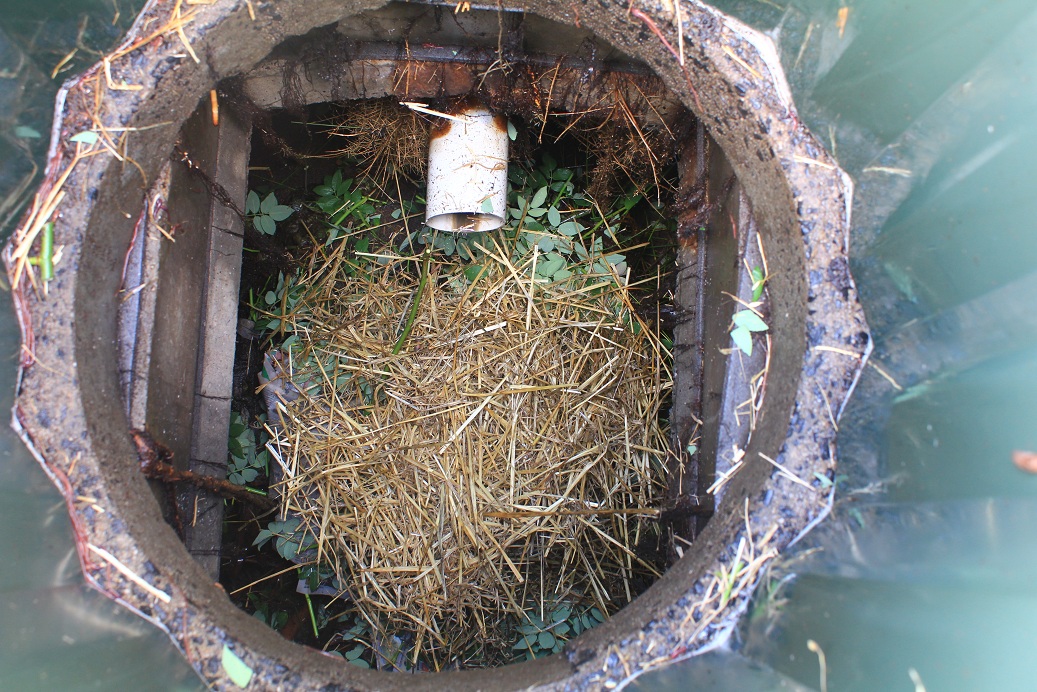 |
| Looks like a compost heap inside! |
How has it performed?
Even though we have had occasional
issues that need attention, we think its performance over the 12 years has been
excellent. During this period it has largely
operated day in and day out without us giving it a second thought.
The issues
that have arisen with the system have mostly been of a minor nature and were
easily fixed.
- Stuck floats. A couple of times the floats that turn the system off and on have become stuck. Usually the solution is to give the sump outflow pipe a shake and this frees them up.
- Build up of sediment. Every year or so we pull the pump out of the sump, wash it down, inspect it and empty any sediment that has built up in the bottom of the sump. The pump is not designed to cope with sediment so this is more of a precautionary measure.
- Pumps have a limited lifespan. Our issue with the pump was detailed in the last post
- Blocked Disposal trenches. This took a bit of effort to solve, but was very site specific. During the drought (years of very dry conditions) the ground surrounding our disposal trenches dried out to such an extent, it had set like concrete, and lost the capacity to absorb water. We would have had the same issue with any system of underground distribution of waste water. In these conditions our soils were just not capable of absorbing the required amounts of waste water quickly enough. We replaced the first few metres of the installed underground distribution channels with Plastic Domed Drain Material which had a much bigger capacity and was capable of holding the waste water long enough for it to be absorbed over a longer period of time.
 |
| Domed drainage added to each absorption trench |
Most of our issues were relatively
easy to solve in retrospect. They were also part of the process of learning about
how the system works, its limitations and maintenance needs. This last point is
part of our basic philosophy – to take responsibility where possible for
growing food, generating power, harvesting rain water and disposing of our own
waste. Life has become one huge learning experience!


5 comments:
Hi, A great post as usual.
I would love to know how to remove the sediment? It is a real pain.
I too have had trouble with stuck floats, loss of prime on the white hard pipe just above the pump (air leak) I find that where the waste water discharges onto the pile it quickly creates a hole in the pile so that the resident time of the incoming waste water(poo etc) on the side of the pile is probably measured in seconds.(hardly ideal)
I agree this system should be used in gravity mode and not use a pump if at all possible. Also when the pipes are installed into the tank including the composting bin the gaps aren't (sealed say with silicon) This is a big problem. So when it rains lots water floods into the chamber from water running along the ground. I then pay for electricity for many hours to pump out this water. Next time you get a downfall go open the composting lid. The white piggy back plug gets easily wet inside as it isn't of a waterproof design. I had troubles with it arcing. The groove around the side of the plug where the two halves meet draw in water even from a heavy dew.
Also I recently seen a new one installed it appears as if some changes have been made. I think the new one has a screened air intake pipe for the chamber. It has puzzled me before why there is the whirly bird vent but no air intake hole. (Perhaps it pulls air through the waste water delivery pipe?) So maybe they have modified it. On closer view of your pic down the composting chute your delivery pipe appears longer than mine. This may be why I have trouble with the water blasting a hole in the side of the compost pile. I may have to try to extend it. I ended up buying a cheap sump pump and hose so I can drain the chamber when I have problems with the pump it is heaps better than bucketing it out. A nicer experience as well. ;)
Thanks for the comments Ramsey.
Not sure if it is luck or good design but we don’t have ground water flowing into our system – ours sits up a small amount above the surrounding ground which drains away. Our inlet pipe deposits waste more into the centre of the pile. We add plenty of cardboard from time to time and try to direct it to the sides of the pile to form additional filter material on the sides. We do not get much sediment in the sump, but have a low cut ice cream container which we use to scoop it out once a year or so.
We haven’t had problems with the electrical plugs but did have a problem with the power point once when ants made a nest inside causing arcing. Having a cheap sump pump for emergency use is a good idea and we have now actually purchased one for just this purpose. Hopefully we will find other uses for it as well.
This is my first visit to your blog! But I admire the precious time and effort you put into it,especially into interesting articles you share here.
Keep on sharing..
water systems
I also have a A&A wormfarm system and it works well, however the absorption area takes up a large area of my small block and I wonder what foods can be grown on this area? What crops do you grow on your absorption area? any guidance would be appreciated thanks.
Post a Comment